How I Adjust My AVL Mechanical Dobby
- There seem to be 4 important adjustments associated with my AVL Mechanical Dobby that also apply to my Compu-Dobby I units (see below):
- Depth of the Dobby Roller: There are 2 allen-head set screws - one on each side of the dobby housing. The set screws are turned to move the dobby head closer to and farther from the actuators ("piano keys") that depress the selected wires. Note:The AVL manuals stress that adjusting the Compu-Dobby too close to the fingers will cause excessive wear on the solenoids.
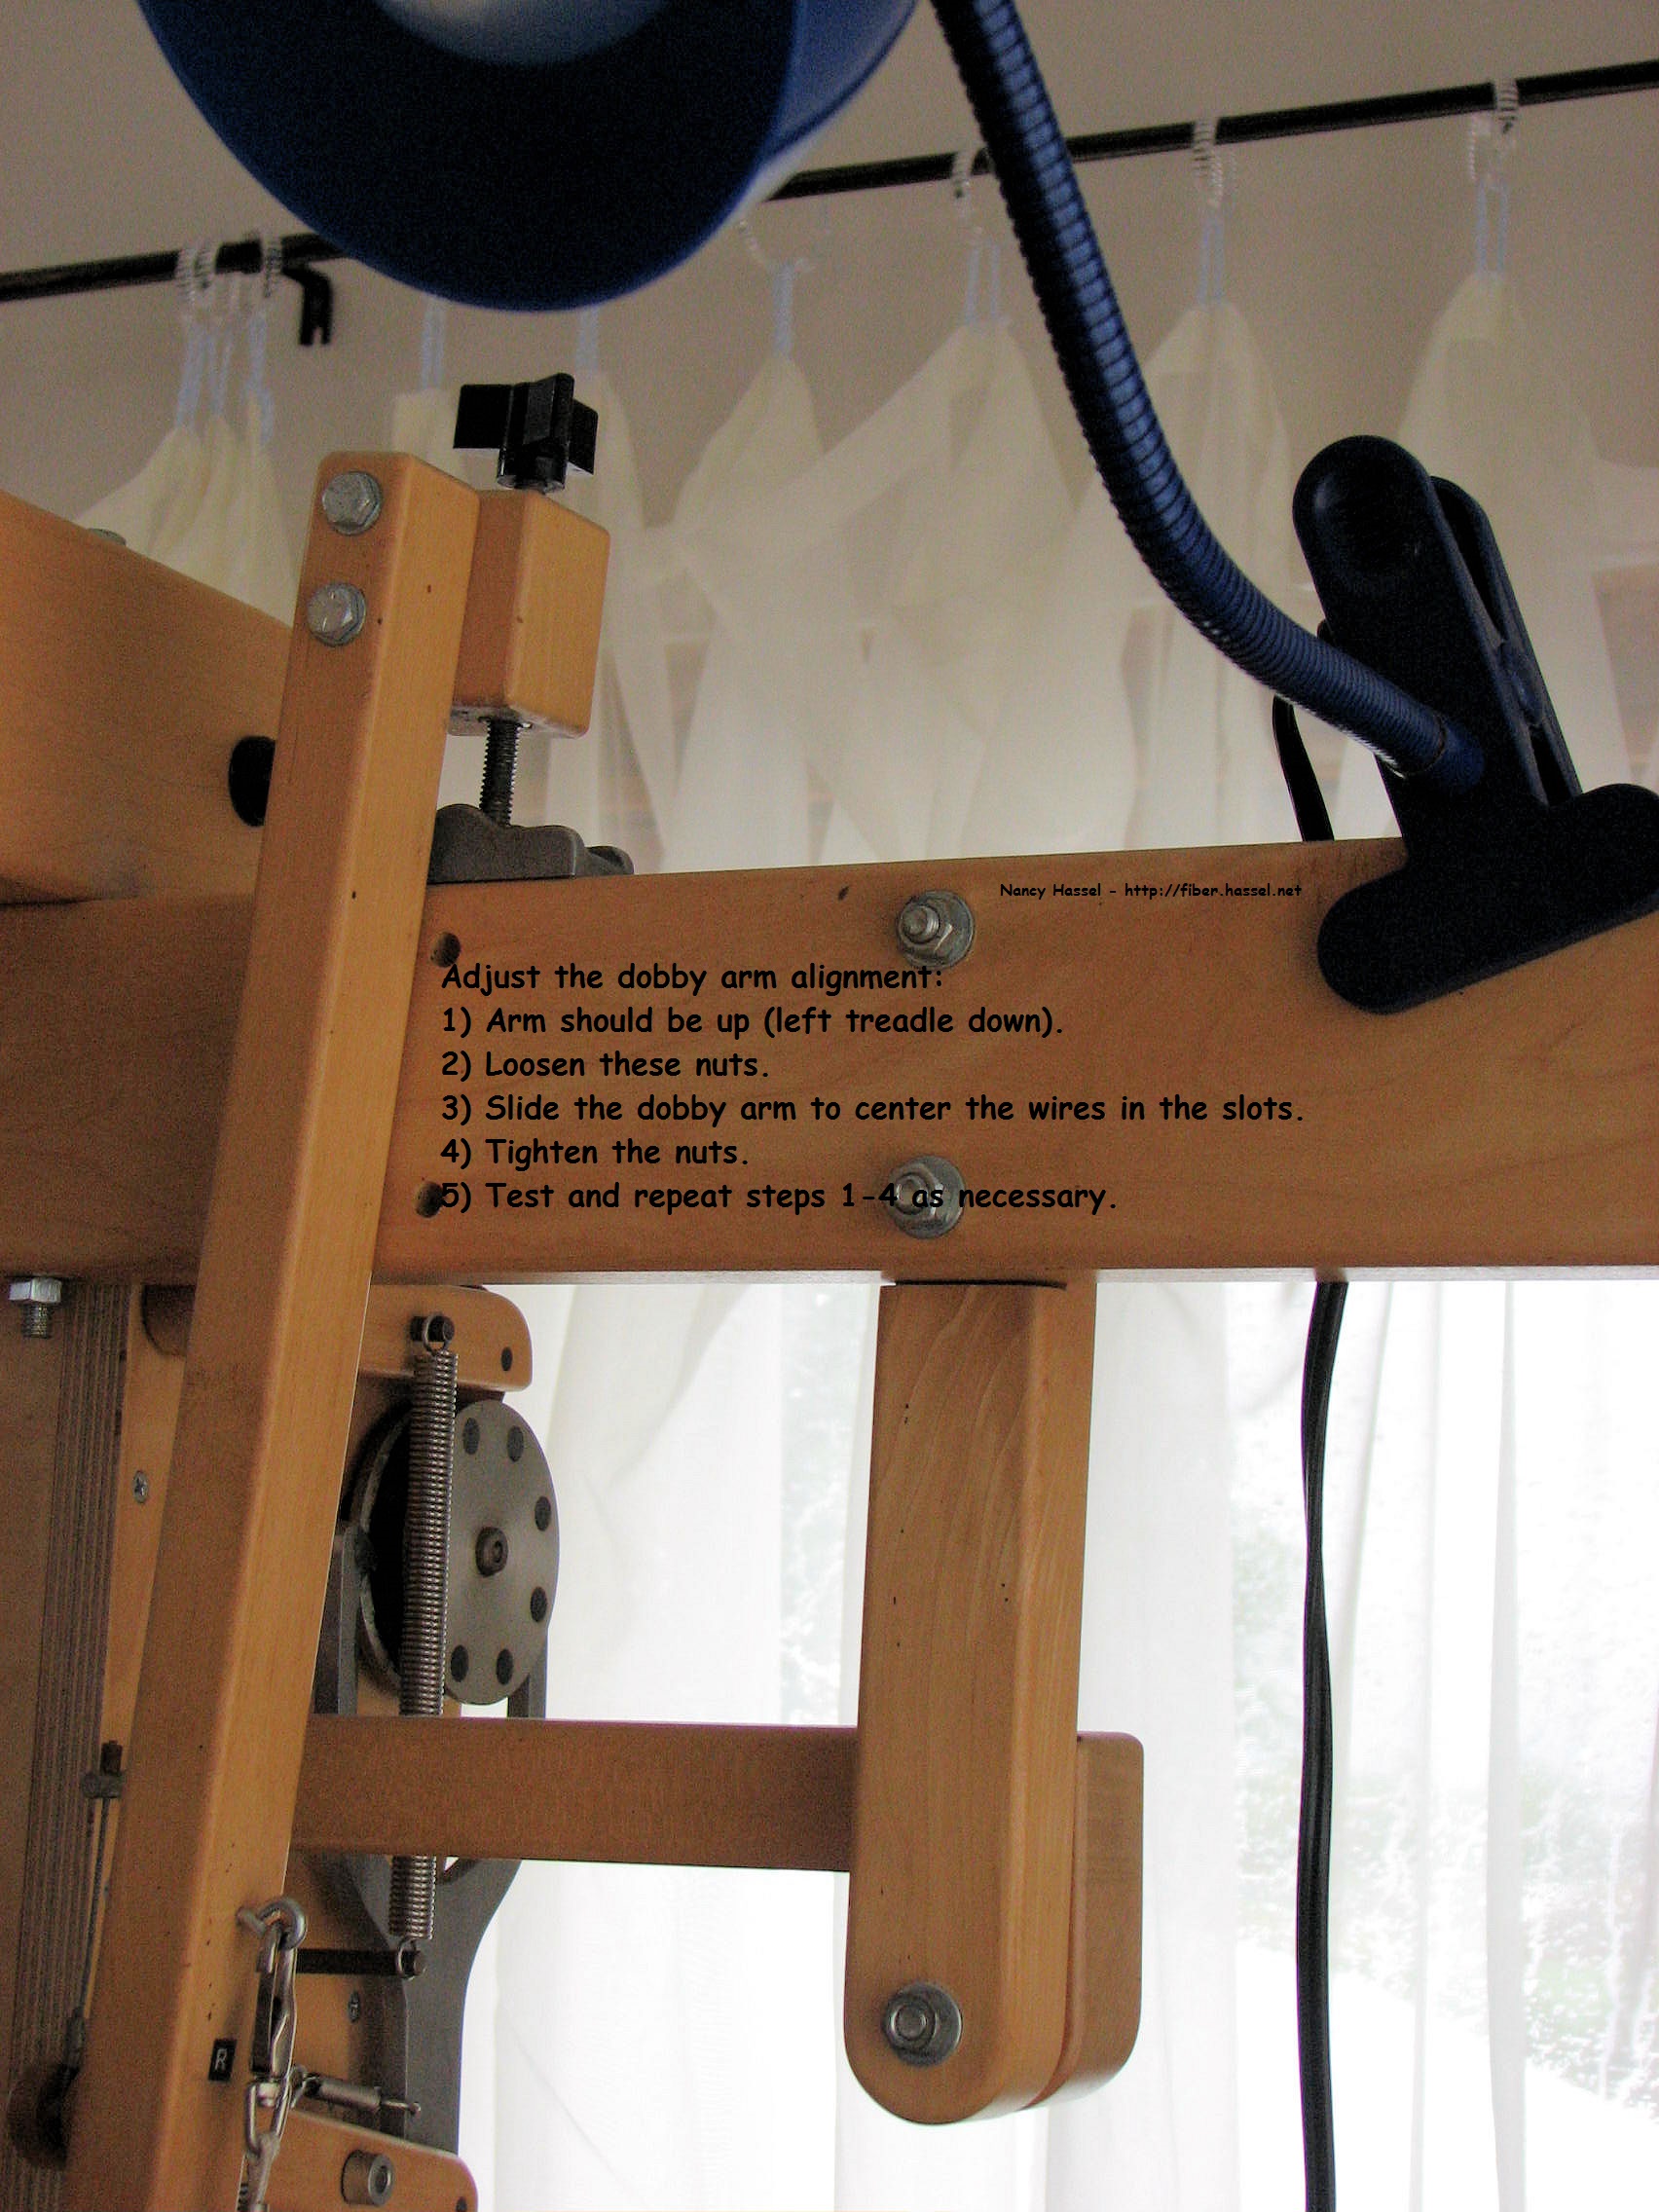
- Dobby Arm Alignment: The dobby arm is adjusted correctly if, when the arm is lifted, the selected cables are aligned with the slots.
To Adjust:
- Arm should be up (left treadle down).
- Loosen these nuts.
- Slide the dobby arm to center the wires in the slots.
- Tighten the nuts.
- Test and repeat steps 1-4 as necessary.
- The third component of dobby adjustment is the cable that runs from the treadle to the dobby. The length must be "correct." Cable length is adjusted via turnbuckle. While weaving, it is necessary to depress the left treadle completely between picks. Fully depressing the left treadle should bring the arm up to the top bumper which releases all of the shafts that were lifted for the pick that was just completed. There should be no balls in the dobby arm comb after the left treadle has been depressed which is necessary preparation for depressing the right treadle to engage shafts for the next pick. When fully depressed the left treadle should not hit the floor. The right treadle lifts the harnesses, and the cable should be tight enough to lift them fully.
- Spring Tension: I used to think spring tension did not matter until I was weaving with 2 warps and super-tightened the warp on one of the beams. Then each of the harnesses for that warp that had been lifted stayed up for the next pick even though they had not been selected. I called AVL in a panic & Bob picked up the phone. After discussion, he suggested that I tighten the springs under the harnesses that were staying up (problem solved, lesson learned).
- Note: When adjusting nuts, screws, and bolts: Remember the adage "Righty Tighty, Lefty Loosey."
- The pictures are annotated. Click a picture to enlarge in a new window:
 |
Here are 2 pictures to help you adjust the depth of the dobby head. Note that you will want to test harnesses 1 & 16 - if they both lift properly then both sides are adjusted properly. Tighten the lock nuts carefully afterwards so the dobby head does not vibrate out of position. | ||
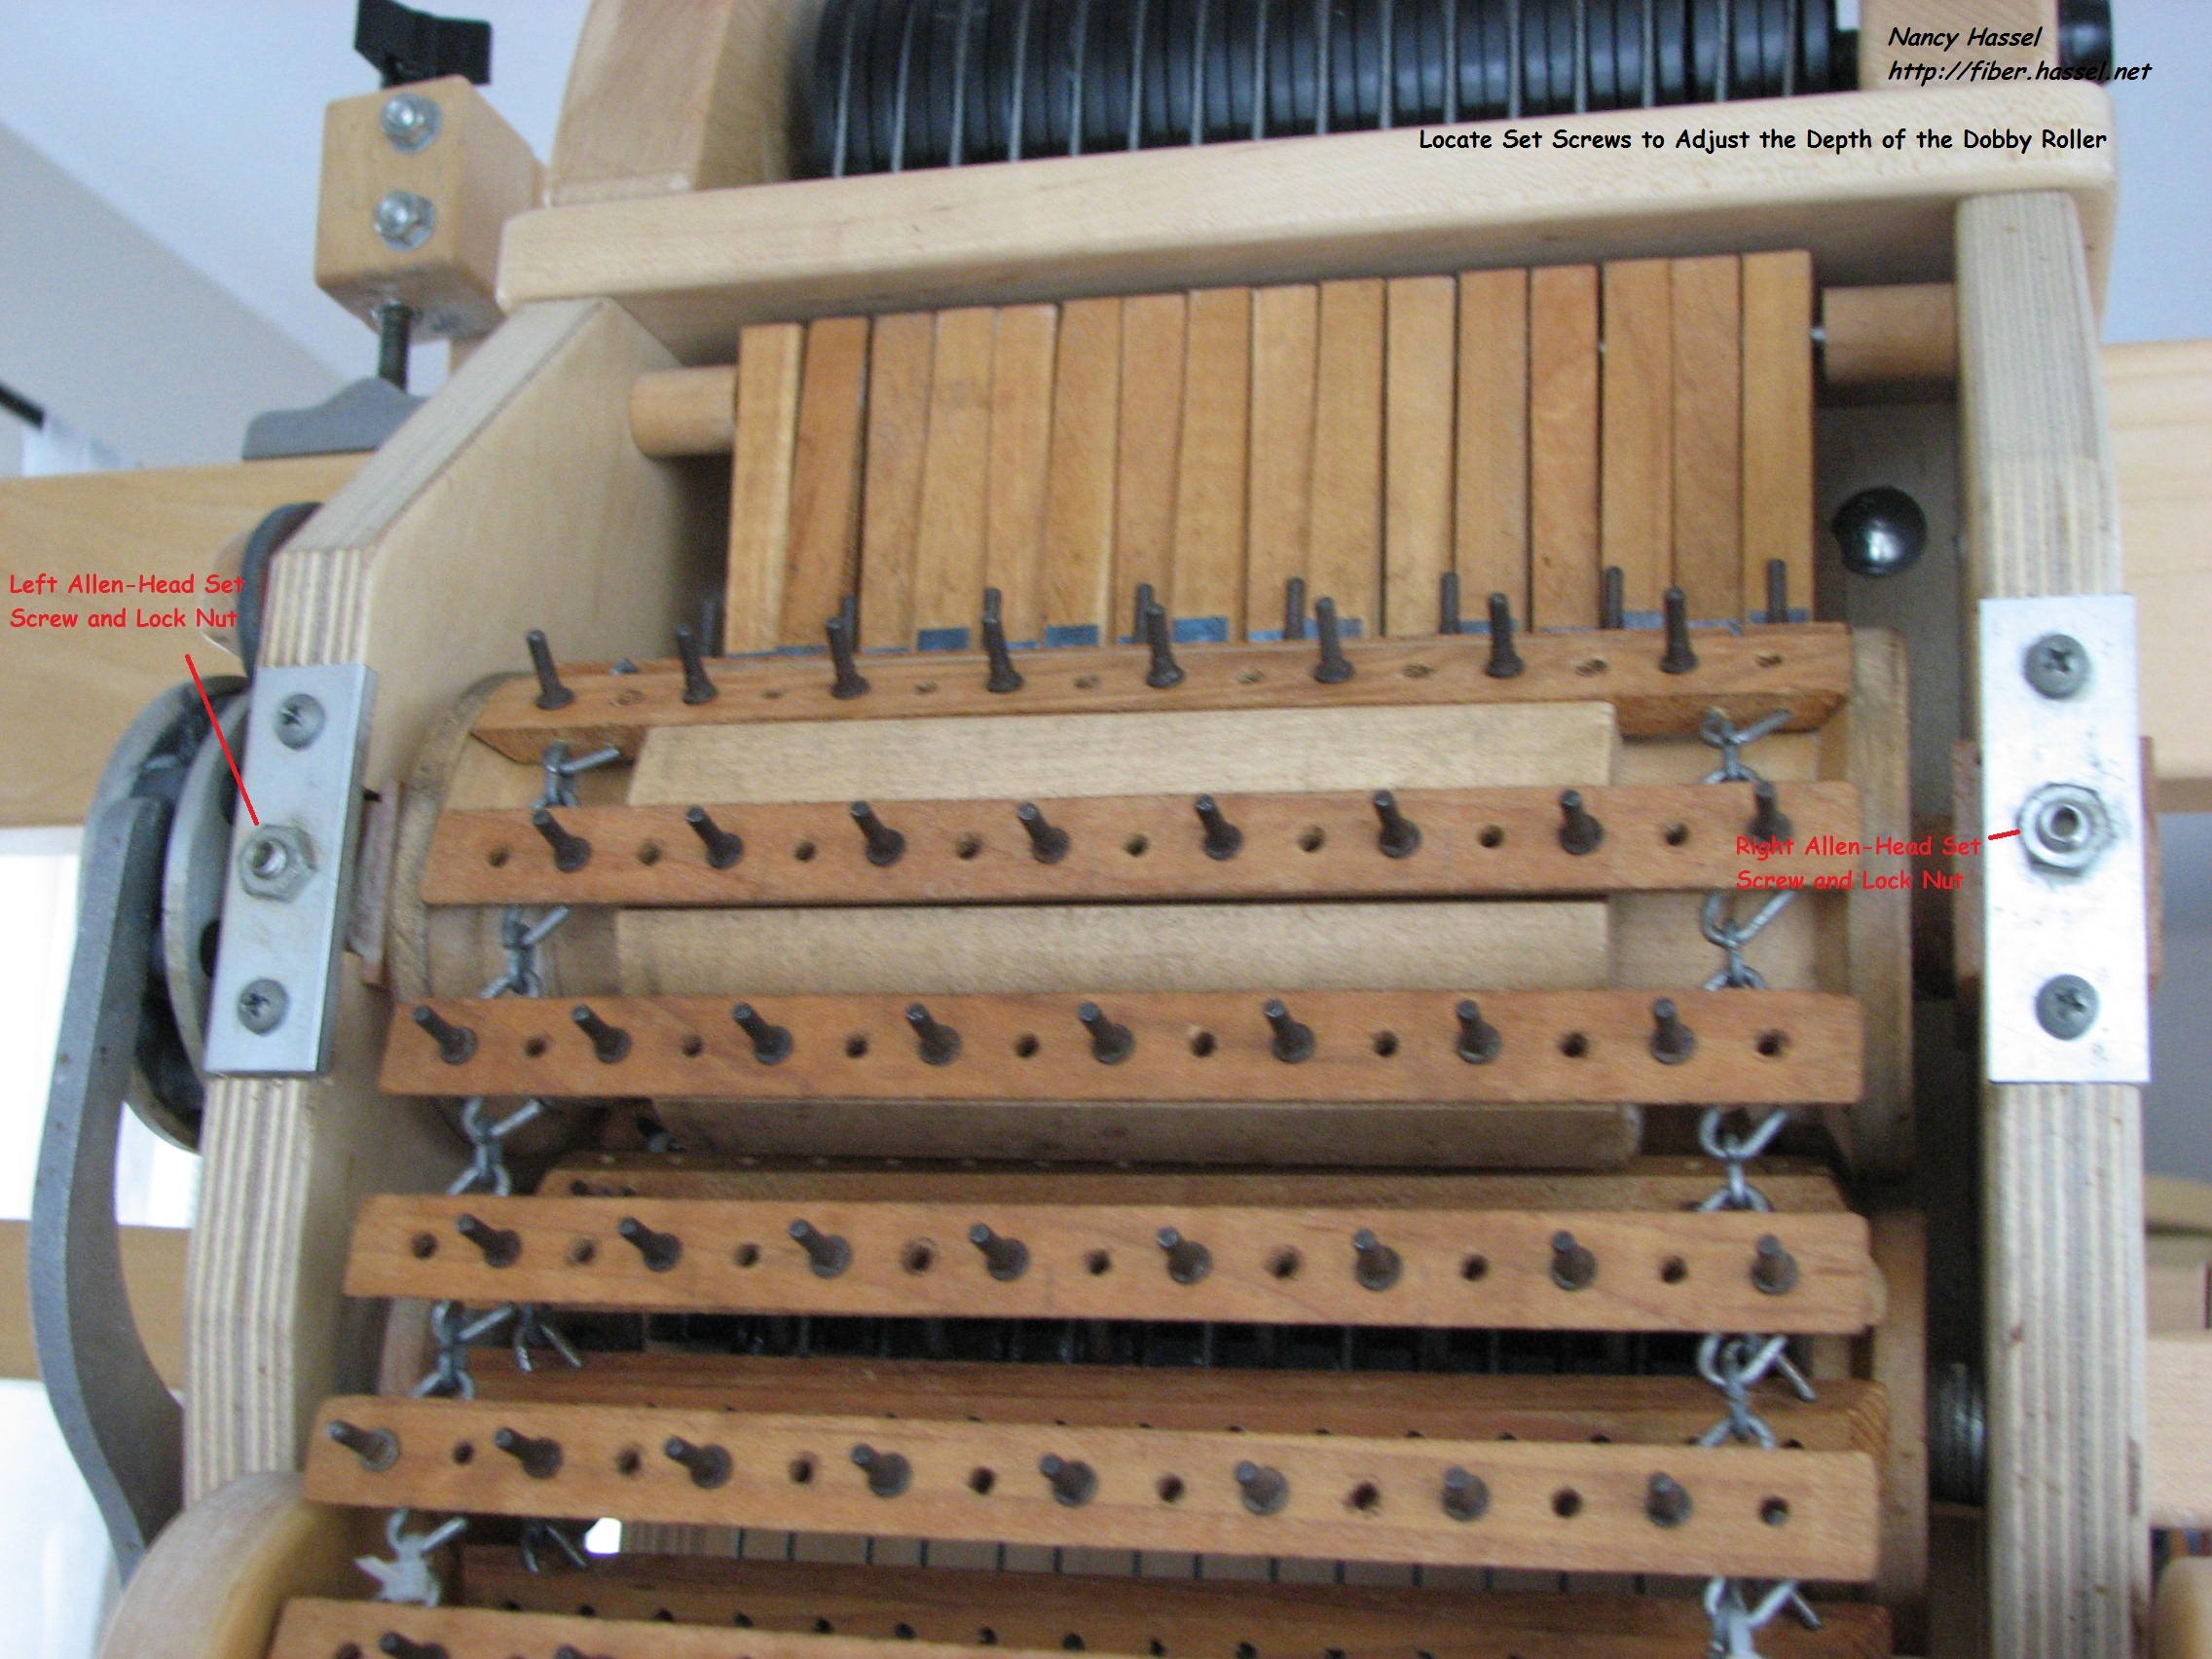 |
Here are the left and right set-screws. Make sure you use the correctly-sized allen wrench. Use the allen wrench to keep the set screw from moving while you use a wrench to turn the lock nut counter-clockwise to loosen. Give the nut a couple of counter-clockwise turns so you can freely adjust the set screw with your allen wrench. When the adjustment is complete use the allen wrench to hold the set screw in place while you re-tighten the lock nut with the wrench (turn clockwise). | ||
 |
How To Adjust Dobby Arm Side-to-Side Alignment | ||
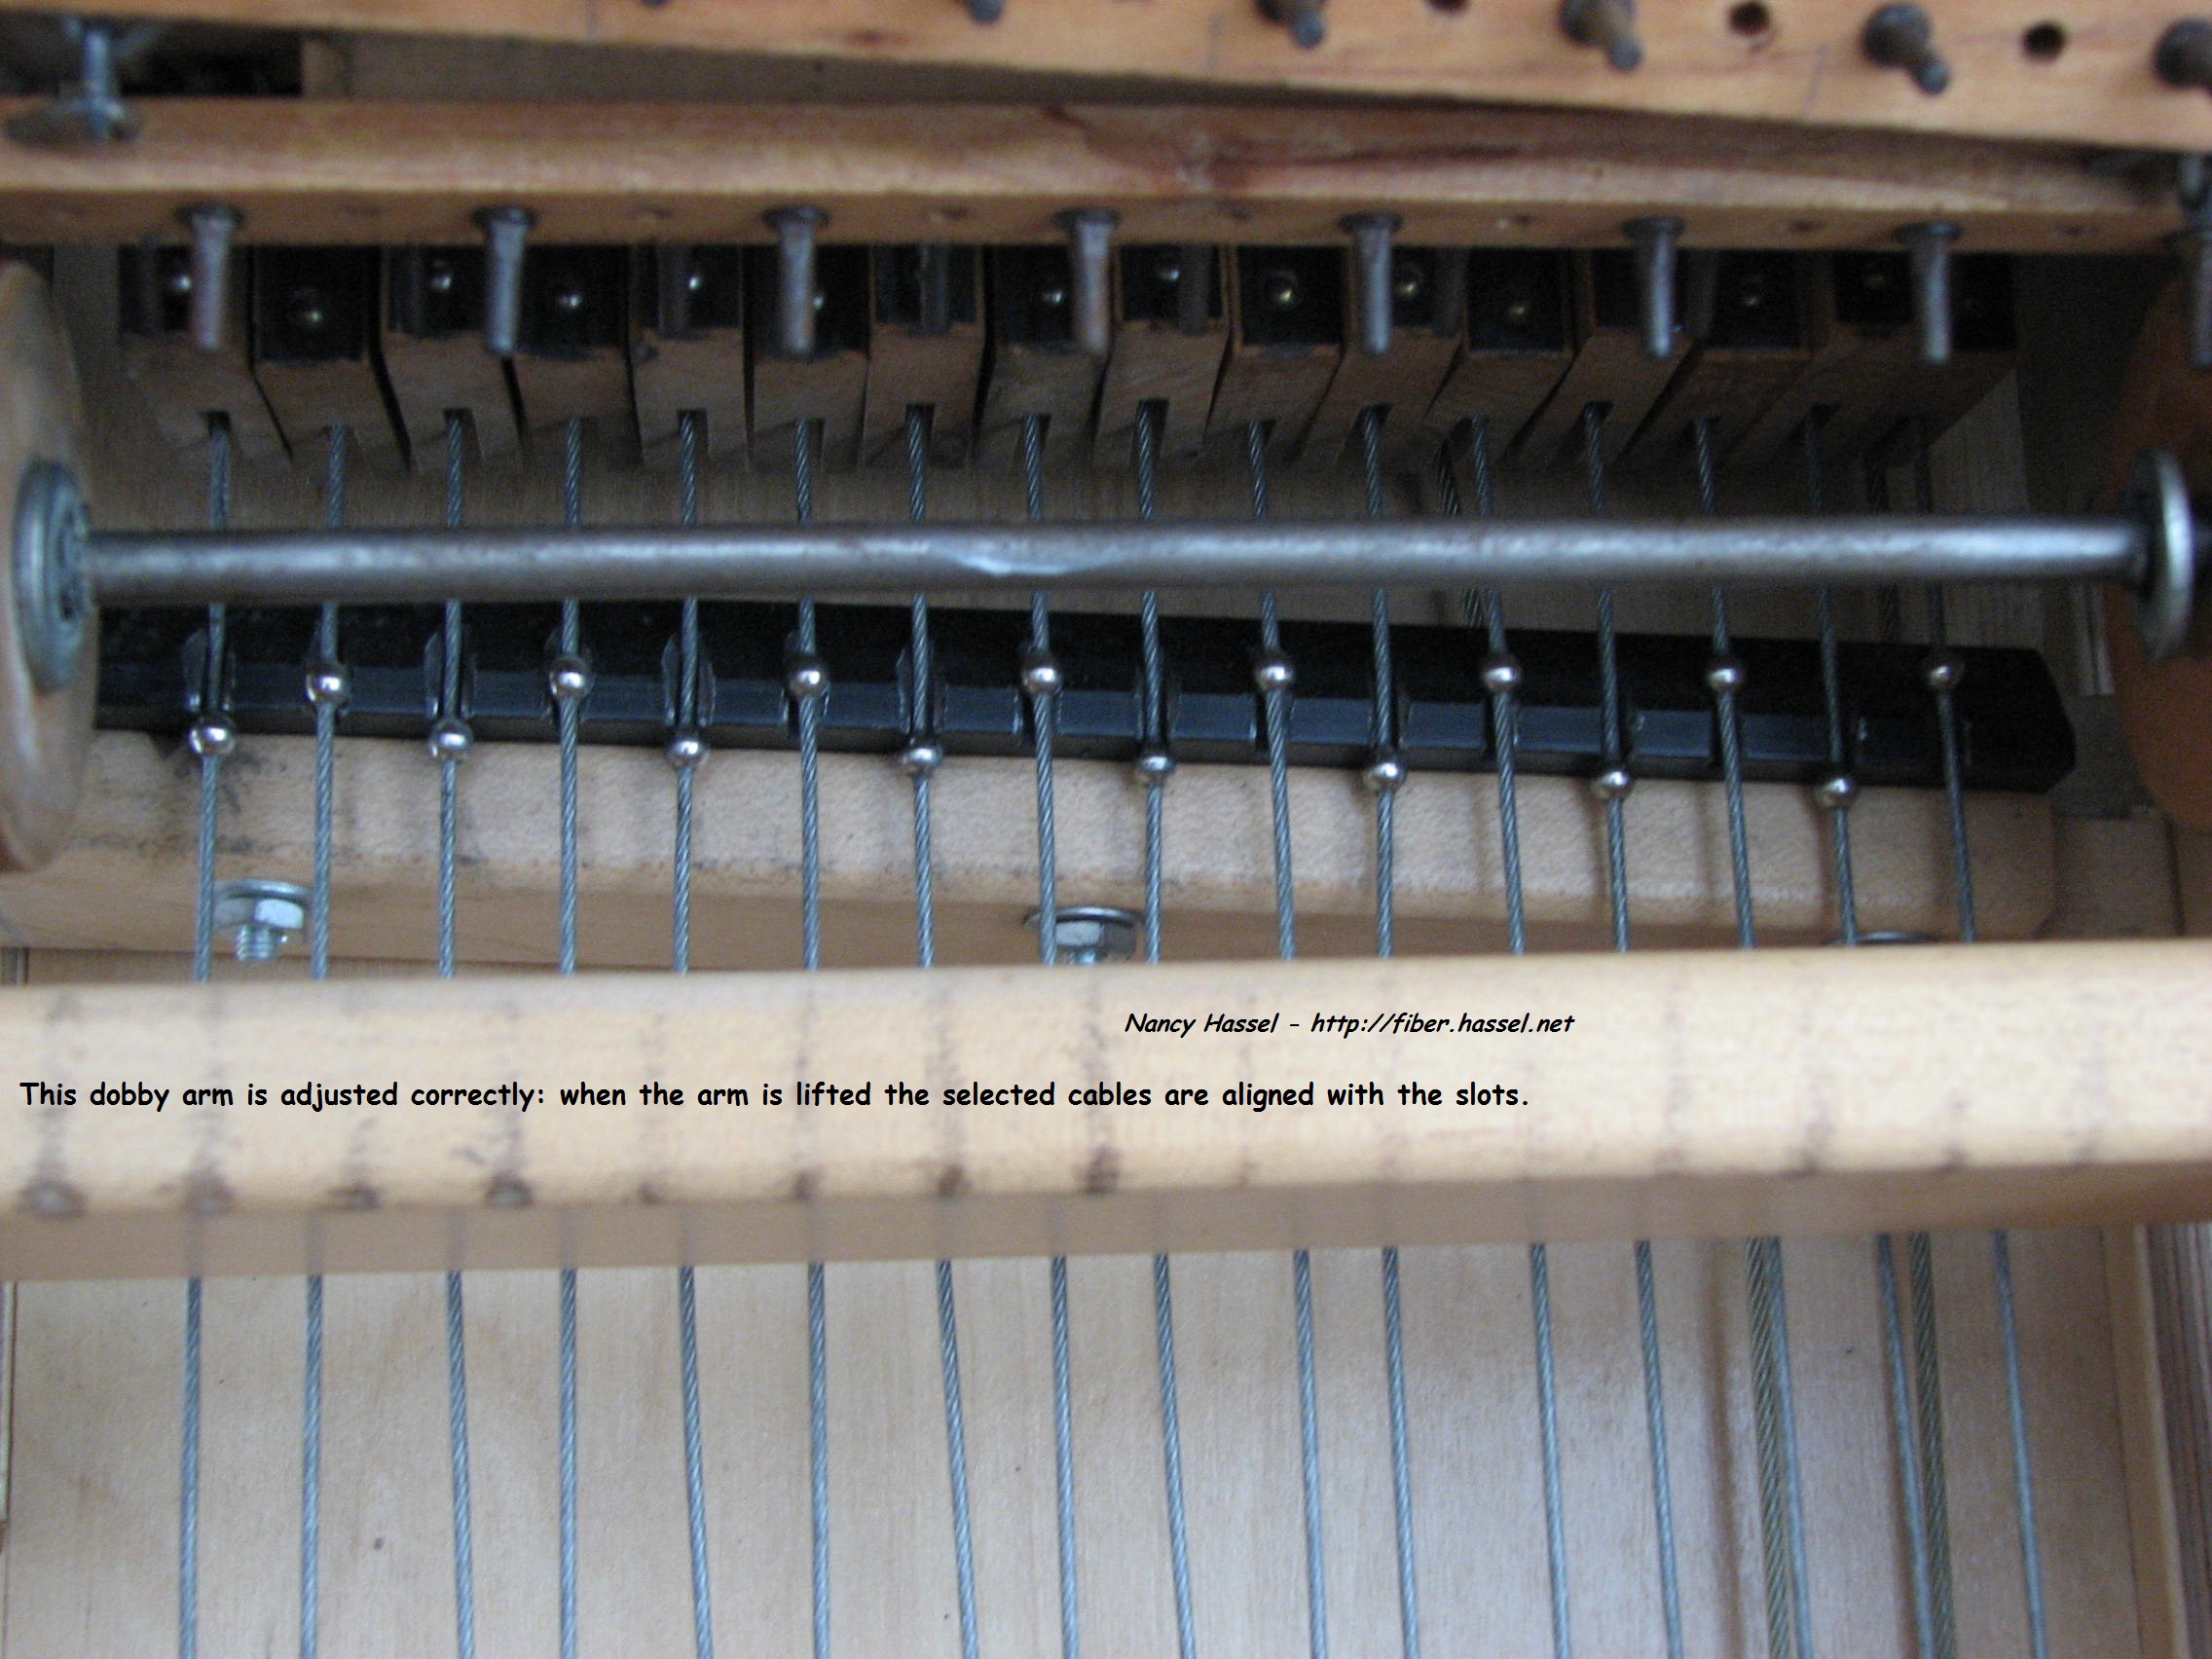 |
Good Dobby Arm Side-to-Side Alignment | ||
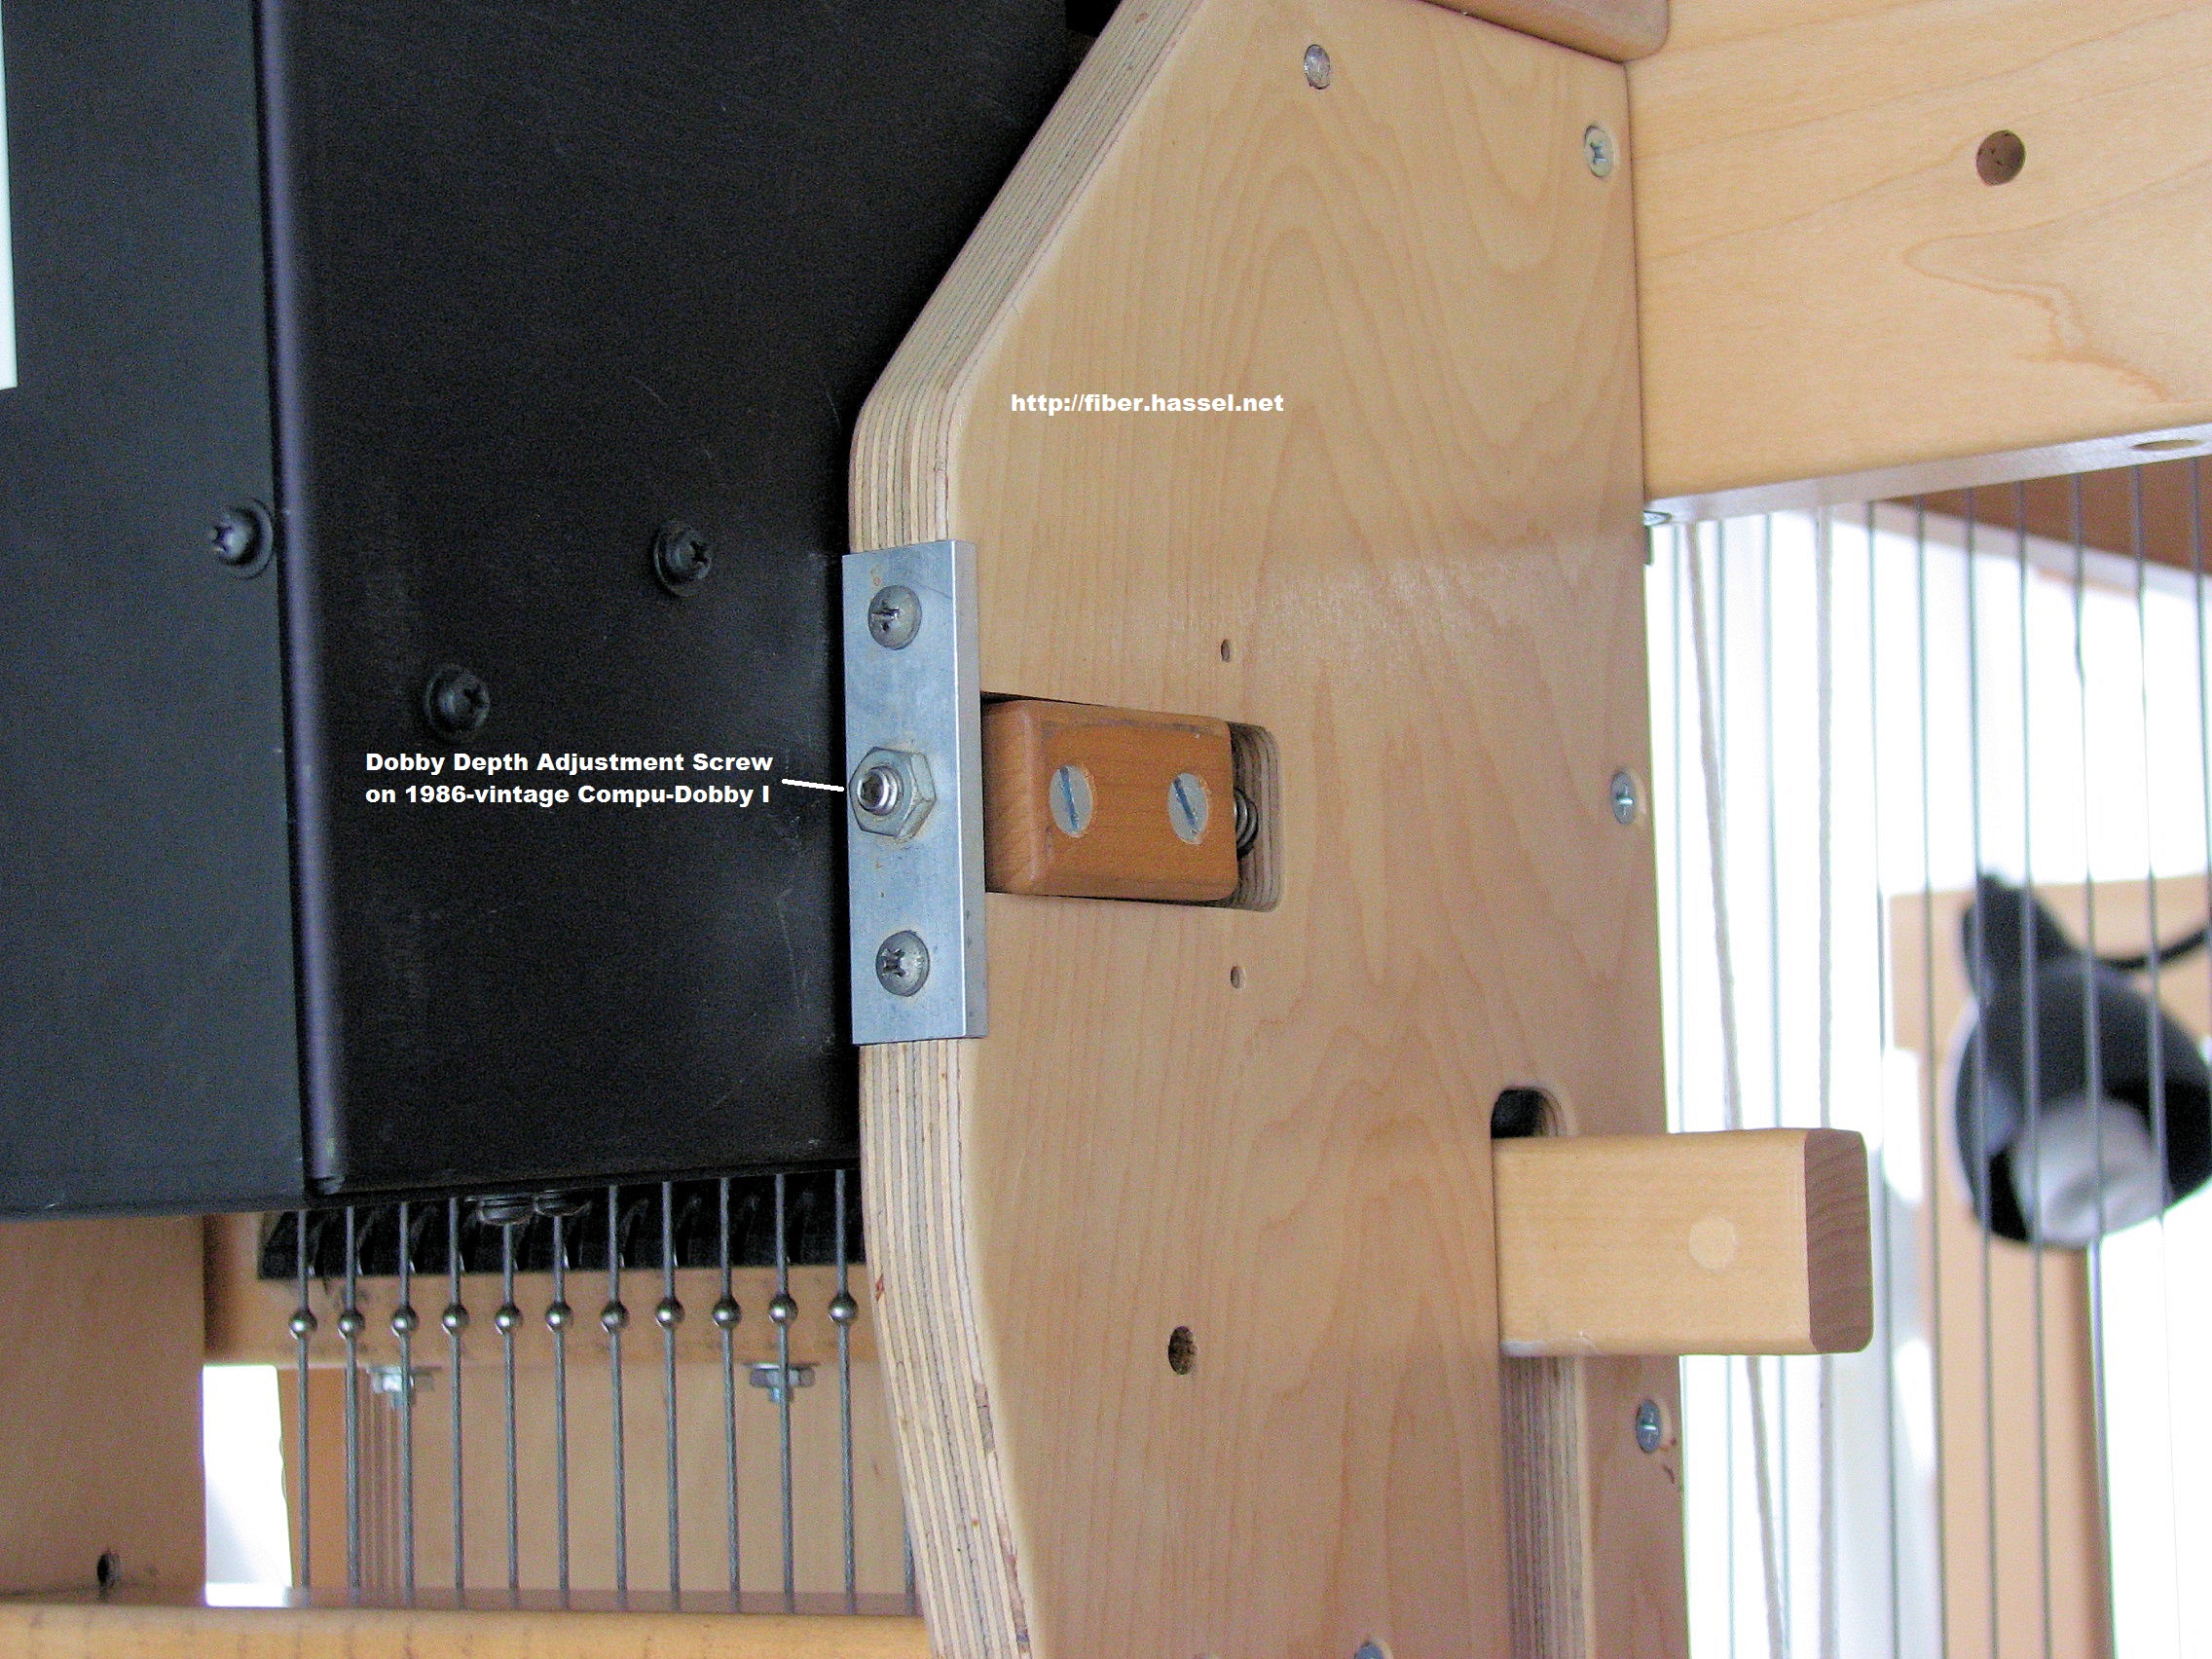 |
Dobby Depth Adjustment on a 1986-vintage Compu-Dobby I | ||
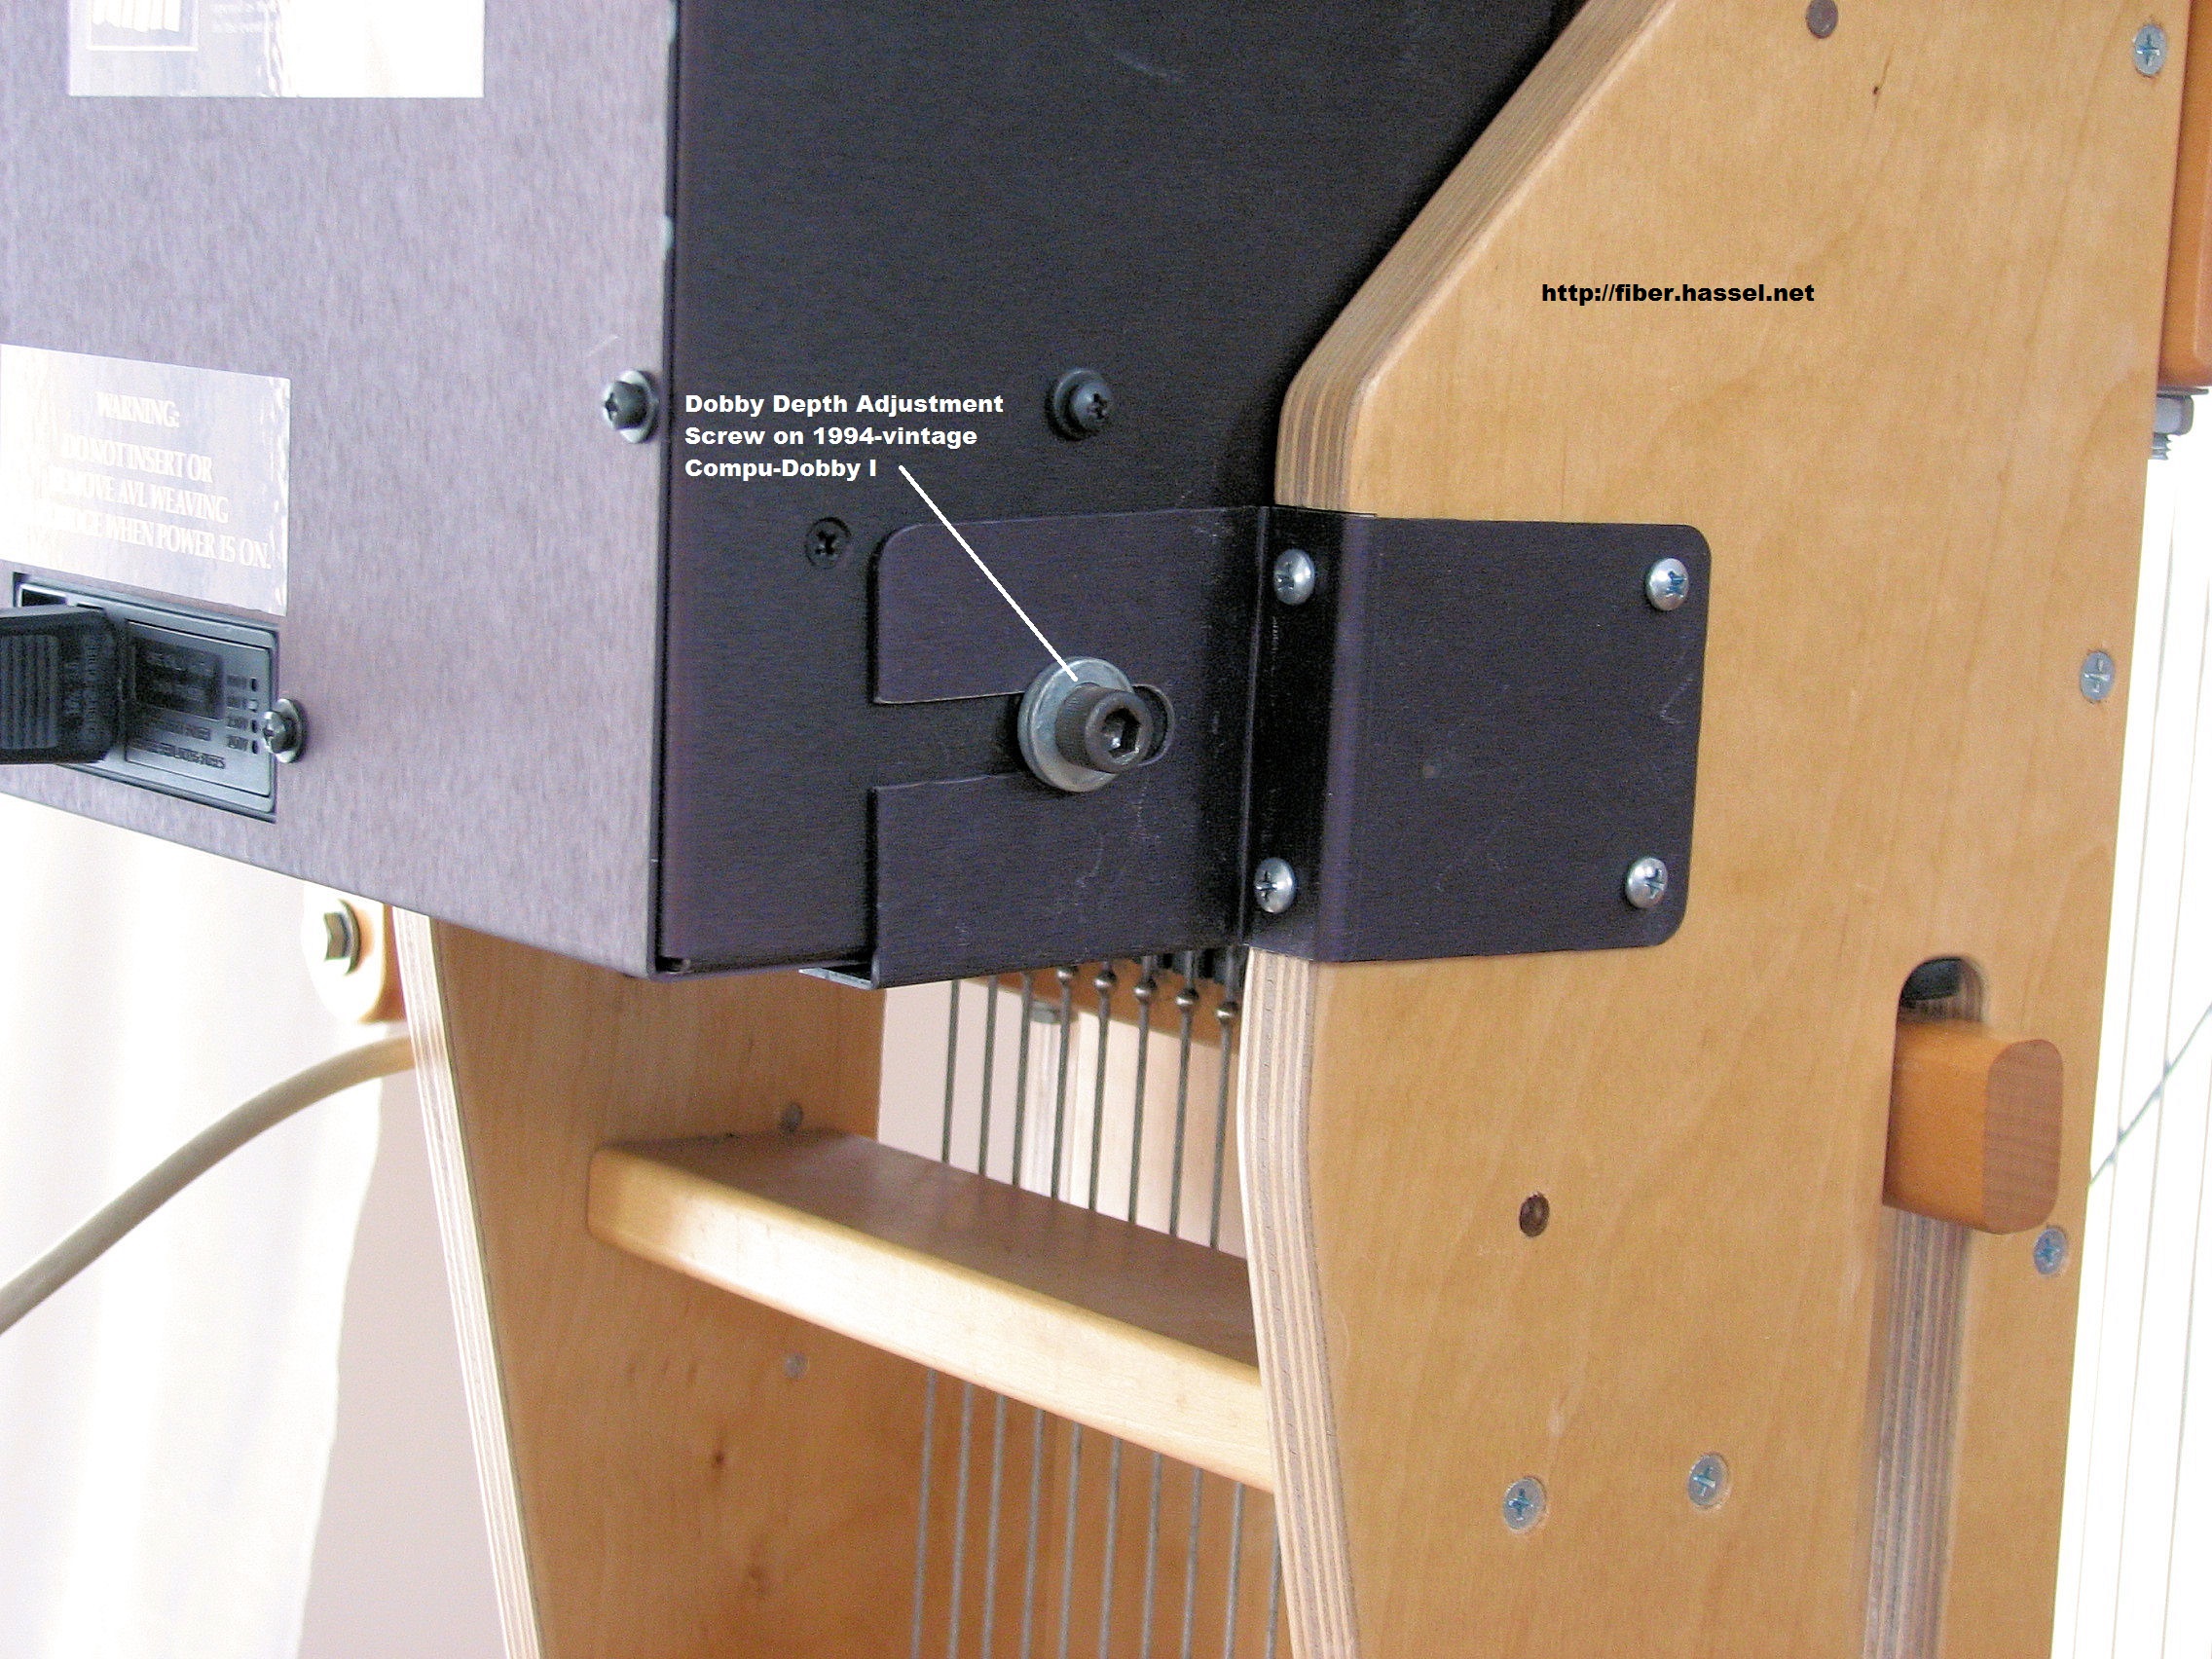 |
Dobby Depth Adjustment on a 1994-vintage Compu-Dobby I | ||
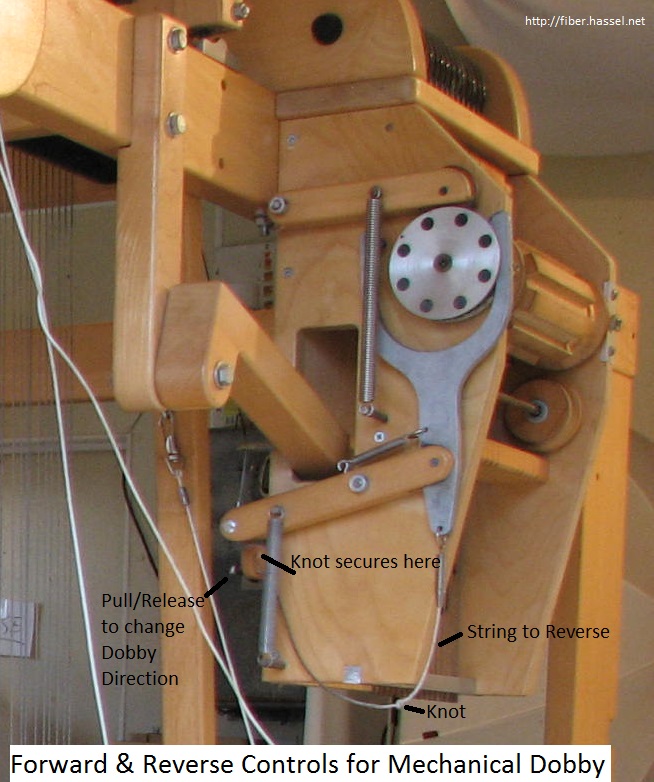 |
Forward & Reverse Control on AVL Mechanical Dobby: Pull string to secure knot behind hole or release to allow cord to go slack (pictured) | ||